Skip navigation

Tag Archives: Configuration


Recentely, we have finally got upgrade to new environment which is Cisco UCS 2.0. We are all excited with new toy but we ran into some design issue s which I would like to record here so you can avoid it in the future.


FC Uplink needs to be at right ports.

I think this is basic common knowledge but  clearly, we don’t know. With Fabric Interconnector, we need to configure FC port to connect to Uplink FC switch. At first, we put FC ports in the middle of switch and put Ethernet Uplink at the end of switch (like port 31/32). Then, we realize it’s not doable once we get into configuration.

click that to get into FC port configuration

Click Yes

We put FC link in the middle, which is wrong. Ethernet port at the end. As you can see, there is slide bar to slide to configure. Once you slide, you will see this.

All ports on right side of bar will be FC ports. So you can either put FC to expansion model or you have to change your ports.


UCS Memory is bigger than your hard disk

Well, this actually sounds ridiculous. But it’s one of reasons why we bought UCS. Our Blade has 196GB memory and we will put Vmware on them. We also bought 100GB SSD to increase swap file speed. Unfortunately, at that time we purchased, we didn’t realize that to put swap file of vms on local disk, we need at least same size 196GB as memory so vm swap file can use local disk rather than precious of SAN storage. Even with new vSphere 5 feature (Swap host cache in SSD), that function won’t help much only we have memory contention. So if we balance it out, we should buy some big size of SAS to cover that.

vMotion is No!

Well, maybe it’s just me that I’m get used to always vMotion everywhere. Once I installed new blade and join them to our vCenter. I tried to offload my vms to new host. Then, I got this error.

Of course, what you need to do is to turn it off and migrate. But then, that’ s outage or you have to EVC.

All those errors can be avoid easily but it’s matter of experience, I guess. Hope it helps.


It seems it becomes sort of tradition for me to apologize delay updates every time I start a new post. The truth is it does happen in recent posts. –_-b

I am currently focus on VCAP-DCA exam and so does that help me to excuse myself little bit? :p

Anyway, welcome to read my post and I will continue to update with my best effort. Today, we are going to talk about migrate ESX3.5 to vSphere with Powercli.

Environment&Goal:

Let me introduce environment first.

The old environment:

We have 7 ESX 3.5 hosts with 100 VMs running on it. It is using SAN base as datastore. 1 physical server is running vCenter 2.5 on it.

New environment:

All ESXs will upgrade to ESXi 4.1U1. vCenter will upgrade to latest version as well. It uses same SAN datastore so that’s a plus in this migration.

Migration Steps

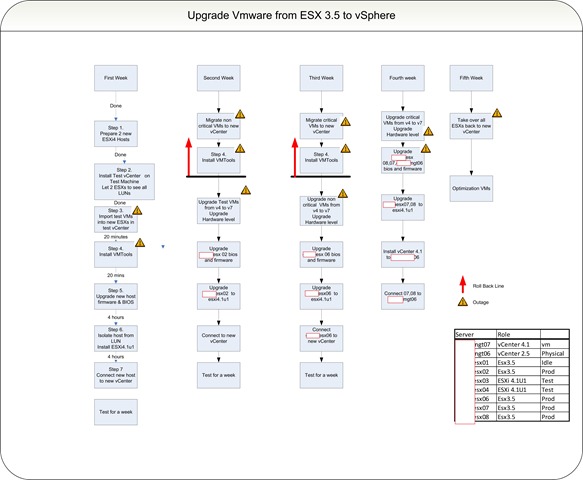
Following is a diagram which give you some brief idea about how I do my migration. It’s little bit big picture, pls be patient when it loads.

upgrade to vsphere diagram

Using Powercli to help you

First of all, Powercli is powerful tool. But I have to mention that sometimes, it’s just much easier to use GUI interface which utilize internal cmelet and scripts to do jobs. However, there are some steps Powercli can fully utilize resource and make job quicker and efficient.

I’m going to describe the “Second week” work from above diagram with powercli power.

Preparation Stage

Powercli

Of course, you need to download powercli and install first. You can find out the powercli from vmware website. or here

if you want, you can download Vmware Update Manager Powercli snap-in as well from here.

After you install powercli, you need to run it.

You may encounter this error when you run it. Regardless 32bit or 64bit version.

powercli_001

All what you need to do is run command as following:

powercli_002

then, close the powercli and rerun it again.

Scripts:

To do those jobs, you will find following scripts coming very handy.

Upgrade-vHardware_Templates

upgrade-vhardware_vm

Those are very good scripts although they are not watch-free scripts. It means it does require some modification or you have manually interfere when it stuck at some place time by time.

What we need to do

Following steps are what we try to do in this week.

1. 20 VMs need to migrate to new vCenter.

Well, there are 20 test vms currently running on the old hosts. Since they are sharing the same datastore(both new environment and old environment), we can just shutdown and register them on new vCenter.

1.1 connect to vCenter

Connect-VIServer your_vCenter

Note: You do can connect to host but we are working on vCenter since VMs are crossing multiple hosts.

powercli_003

1.2 created a new folder so I can operate VMs at same time.

You need to make sure that folder is “blue” folder not yellow folder

In this example, I found there a blue templates folder. so I will create migration folder beneath it.

New-Folder -Name migration -Location templates

1.3 Move all test VMs to this folder

Move-VM -VM yourvmname -Destination migration

You need replace yourvmname with each VM you want to move. If VM has long name, you can use yourvmname* to get rid of rest name part.

Use following command to check all vms in the “migration” folder or not

get-vm -Location migration

1.4 Create old_vmtools folder in the new vCenter

You do same thing as above and create a new folder in the vCenter called “old_vmtools” to accept those VMs.

1.5 stop all test vms

You need stop VMs from old vcenter so you can import them into new vCenter

You will love these with powercli

get-vm -Location migration|Shutdown-VMGuest

You can use stop-vm but that will turn VM off immediately.

1.6 Import vmx into new vCenter

You can do this step with script, but it’s too much trouble. It’s easier to just manually do it on new vCenter via GUI interface. When you import them, pls make sure you import them to “old_vmtools” folder.

1.7 Install VMtools

You must install VMTOOLS before you upgrade vm hardware level.

get-vm –location old_vmtools|start-vm

Here is intersection. You either use script upgrade-vhardware_vm which will install vmtools and upgrade vm hardware or you can manually install Vmtools first. Then, you use script to upgrade Vm hardware.

For safe reason, I did the second idea.

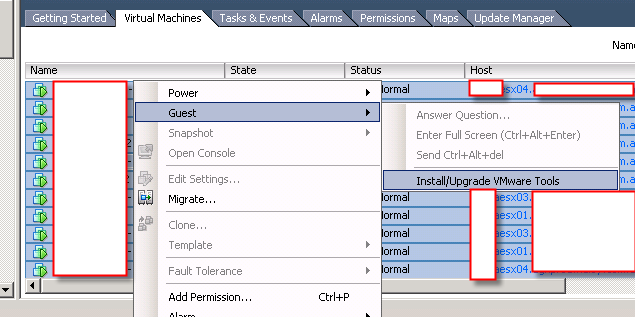
You can just click folder name on vCenter, and choose “Virtual Machine” tab on the right side window. Use “Shift” key to select all vms, and right click to choose

powercli_004

It will upgrade all VMs vmtools automatically. Wait for 30 mins and come back.

You may notice some of VMs failed on upgrade.

You need to open those VM console and go to VM->install Vmtools on the manual. It will automatically load Vmtools installation iso on the vm cd-rom.

go to cmd and go do cd-rom and run

d:\setup /c

This will manually remove old-vmtools. Then, you will install it again.

d:\setup

1.8 upgrade vm hardware

After make sure all VMs got new vmtools, then you can safely use script to upgrade vm hardware.

All what you need to do is to download script. Change extension name from docx to ps1. Copy this script to the server where powercli runs.

In the powercli, you just need to type name of script and run.

powercli_005

This script asks you which vCenter and folder where VMs sit. Answer those questions, the script will stop VMs one by one, check vmhardware version. Upgrade version if it is old. And restart vm.

Note: sometimes, shutdown vm takes too long before script try to convert vm hardware version. so it will stuck. You need manually upgrade hardware version and manually start vm.

1.9 remove old vms from old vCenter

at old vCenter

get-vm –location migration | remove-vm

2.0 move vms to test folder

at new vCenter

get-vm –location old_vmtools|move-vm –destination test_folder

Here it is. It’s pretty easy and simple to do the job with powercli.

Please leave comments as usual. Thanks for reading.

Reference:

http://ict-freak.nl/2009/06/27/powercli-upgrading-vhardware-to-vsphere-part-1-templates/


Thank you for still reading my blog. I just had a chance to build a FT VM lab. I record some potential issues and how to resolve the problem. I hope it will help you to understand FT.

Quote the VMware FT compatibility Requirements:

Identify VMware FT compatibility requirements

  • Same Build number for ESX(i) hosts
  • Gigabit NIC’s
  • Common Shared Storage
  • Single Proc machine
  • Thin Provisioned disks not supported (automatically converted)
  • No snapshots

Lab Environment

I have following hardware as my lab equipment.

2 identical HP server. 6 Nics on the server. 1 Test VM running W2K3R2 x64bit.

Test VM has 1 vCPU.

All right. We all set. Let’s see what we can do.

Turn on Fault Tolerance

If you got all your configuration right, all what you need to do is to right click your VM and choose Turn on Fault Tolerance.

ft-01

ft-02

However, you may got following errors.

Typical Errors


1.No FT VMkernel

ft-03

Reason:

FT requires to use specific Network to make sure logs will be copied from Primary VM to Secondary VM. You need to either create a specific VMkernel or use the exist one. In my case, I use my vMotion network since I know I don’t vMotion much.

Solution:

ft-04


2. Insufficient resources for HA

ft-05

Reason:

The FT requires HA to be enabled. However, with my scenario, I only have 2 hosts and HA enabled. The Host failure cluster tolerate is 1 host. FT won’t accept that. The easiest way is to use percentage of resrouces and setup it as 5%.

Solution:

ft-06

3. Thin disk need to be converted to thick

ft-07

Reason:

This is a test lab. The is no double I use thin disk for this test VM. so FT doesn’t work on thin disk and it has be converted to thick.

Solution:

Power off test VM. Go to that VM from datastore broswer and right click the vmdk. Choose “Inflate”

ft-08


Then, it should work!

ft-09

Conclusion:

Few tips for FT. FT is very powerful. I have running ping test from test VM and power off the primary host. No ping was dropped!. But it does generate heaps of traffic on FT log vmkernel (33MBPS). so Please be aware don’t put too much pressure on your network.

Have fun.


Reference:

http://damiankarlson.com/vcap-dca4-exam/objective-4-2-deploy-and-test-vmware-ft/


As usually, I would thank you for continuing browsing my blog although I haven’t uploaded for couple of months. I was caught by my personal errands till, today, one of my friends said, “Silver, why don’t you update your blog? Even just write some nonsense into it”.

Well, personally, I don’t write any useless information in this tech blog. But I do need to update. So here it is. Hope you can enjoy it.

I will show you how to configure VMware Orchestrator. This software is coming with vSphere but it is installed silently and you need to manually configure it. Reason to use VMware Orchestrator will be 2.

A. You have very large and complex Vmware environment and you would like to dig deep and become guru.

B. You need to prepare for VCAP-DCA exam.

Regardless which reason you may have, this post will give you a hand and knock the door for you.


Configure VMware Orchestrator

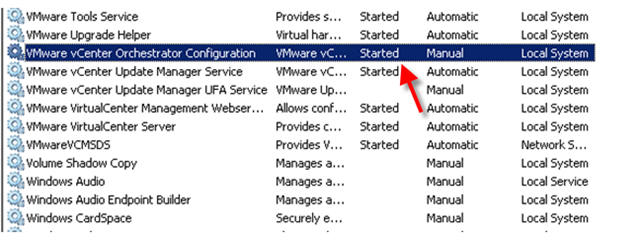
The first thing you need to do is to check out Service “VMware vCenter Orchestrator Configuration” is running. In default, it is manual for start up.

or-001

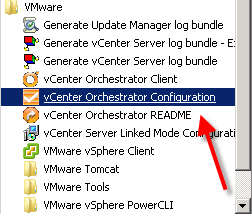
Once you started the Orchestrator Configuration, you can just run “Configuration”

or-002


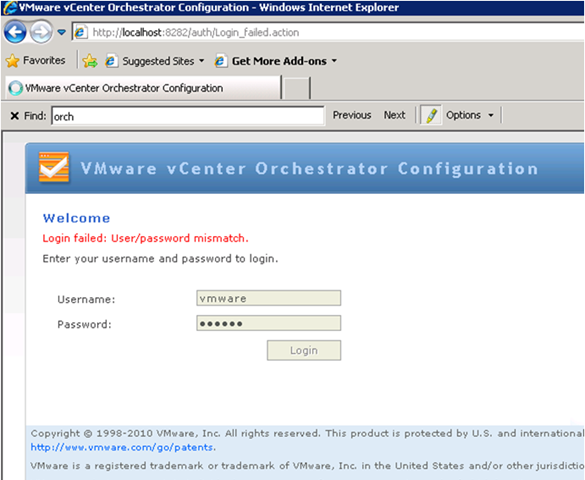
You should see this page coming from IE.

or-003


The default username and password is vmware/vmware.

You should see main interface like this.


General:

or-005

There is nothing you need to configure in the General class for now.

Network:

or-004

so Let’s jump on “Network”. the network configuration is for Orchestrator. So You need to put IP and DNS and keep settings. No drama on that.

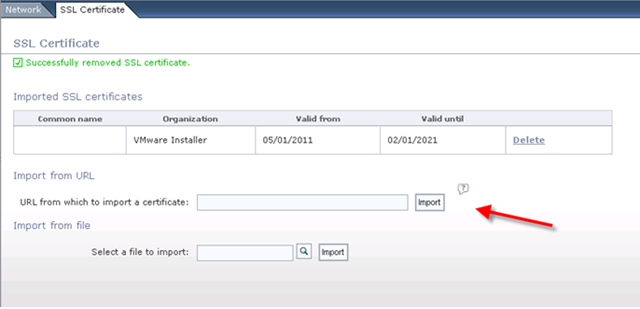
Notice “SSL Certificate” page here, but we don’t configure it for now. You can choose to use CA certificate or your own certificate. In this case, we will generate Orchestrator own certificate first, then we can configure it. Please see Chapter “Server Certificate” below.

LDAP:

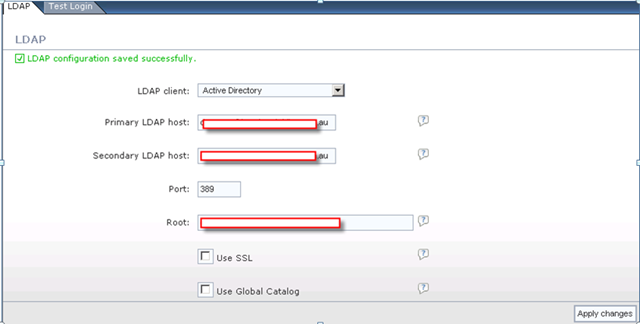
The purpose of LDAP is to let you use AD account to log in to Orchestrator client.

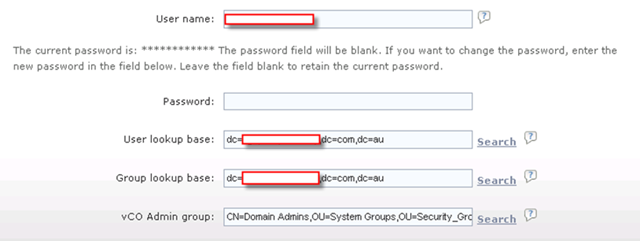
You need fill those blank with your DC servers, and LDAP path.

or-006

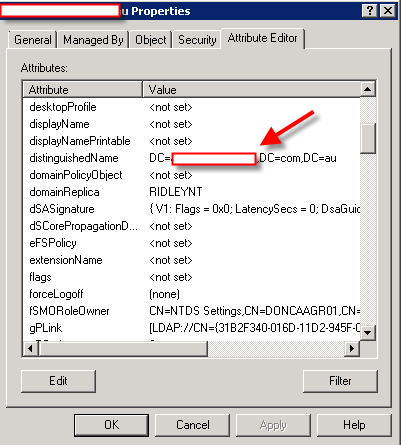
For the root and other group path information, you don’t need to run some scripts to get it. All what you need to do is to run AD Users and computers.

Right click the object (for example, the root of your AD) and click –> “Properties” and go to Attribute Editor and find distinguishedName as follow.

or-007


Same thing for the rest of page.

or-008


Database:

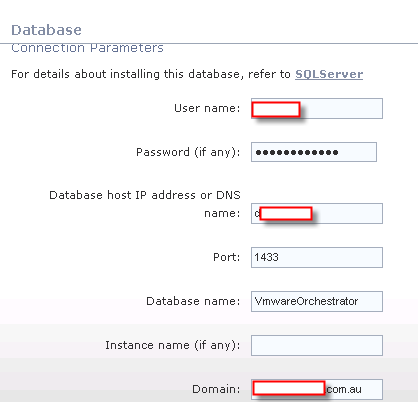
It’s pretty straight forward for configuring database. I’m using SQL database and

or-009

or-010

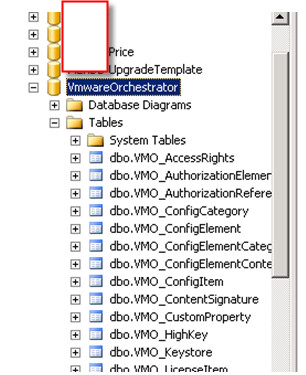
Once you install the database, jump on SQL server and verify it.

or-011


Server Certificate:

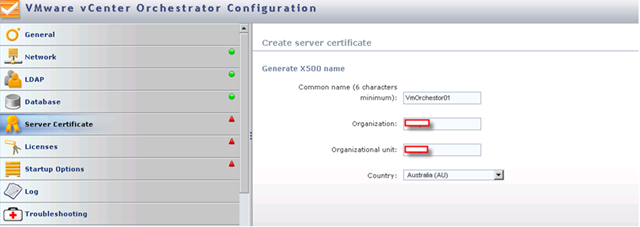
You should generate your own Server certificate here. For some reason, the certificate generate by my Domain CA doesn’t work well here. so I would suggest you do it by yourself.

or-012

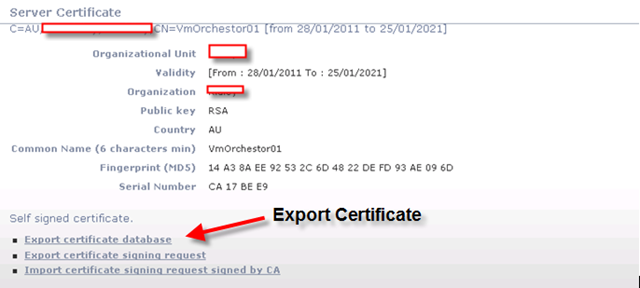
Once you generate certificate, you need to export it to a file protected with password.

or-013

The next step supposes to import certificate back to “Network –>SSL configuration”. If you don’t that, you won’t get “License” right.


License:

This is where you gain license from vCenter and also license for plug-ins.

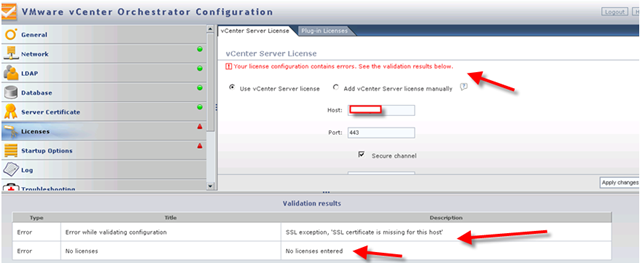
or-014

If you don’t import SSL certificate here, you won’t get right result. Because we need to use secure channel.

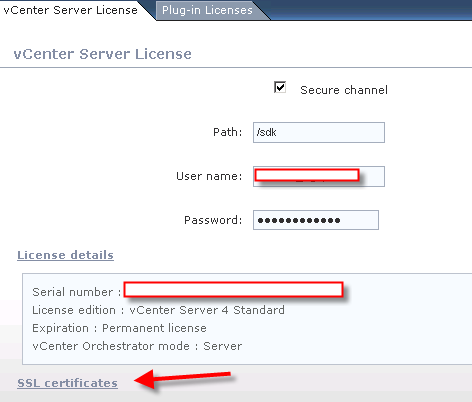
or-015

You need to import your license which you export above.

This will also setup Network configuration->SSL part as well.

or-016

please be noticed:  You may need to restart vCenter to let license work!!

Start up option:

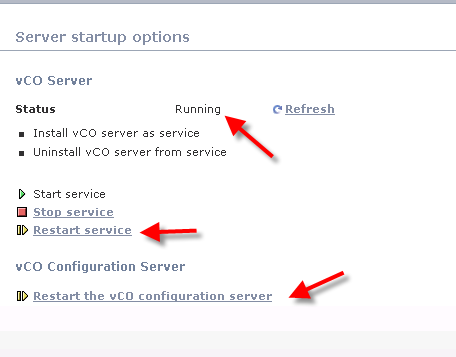
You must make sure the status is “Running”. I was stuck at “Unknown” status for a very long time even after I restart vCenter and Orchestrator services and server. The only way to resolve it is to click those “Restart” buttons in this page. Trust me, they are here for reasons.

or-017

The rest parts are very easy to configure. I just paste picture here as guide.

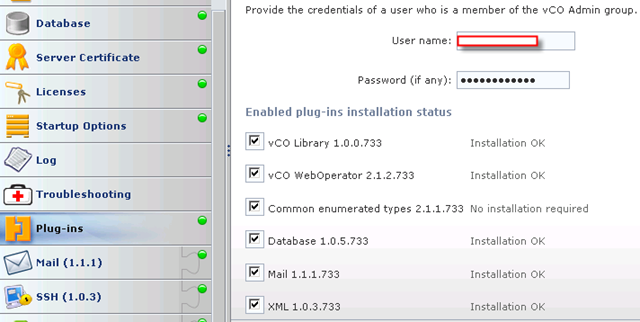
Plug-in:


or-018


Mail:

or-019

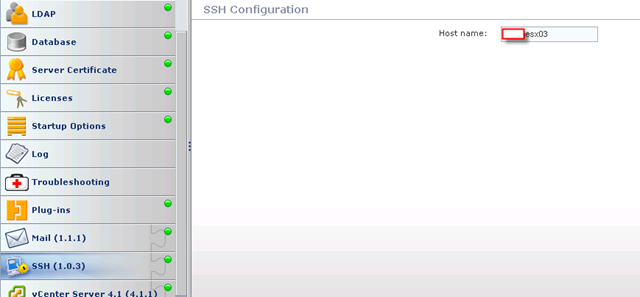
SSH:

This is for connection to your hosts.

or-020

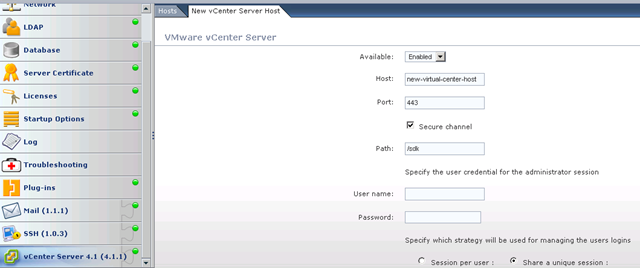
vCenter Server:

This is where you configure your vCenter.

or-021


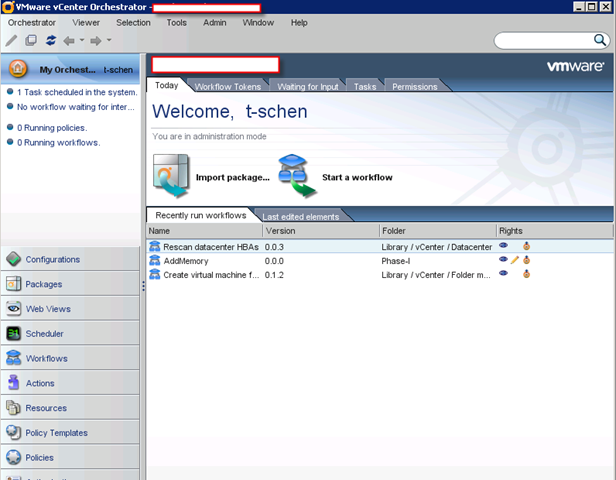
once you finished the configuration, you can get into Orchestrator now via it’s own client. Run it under Vmware you shall see this interface.

or-022


Conclusion:

There are some tricks to setup Orchestrator. But the difficult part is actually to use it since there are lack of good examples and documents.

I would suggest VMworld Orchestrator Lab manual is a very good start. If you do want to know me to give you some examples, please leave your messages.

Thanks


So this is last part of this series. Hopefully, I don’t need to write another post.

From previous post, I discussed about how to install and configure Trend Deep Security 7.5 on vSheild. This post will talk little bit more about configuration and performance review.

In my last post, I have installed vShield Zone on host, Install DS Manager one of my VMs which is also vCenter, and push DS Virtual Appliance on to one of hosts.

Then, I changed the IP and network configuration on the DS VA and activate it with Deep Security Virtual Appliance.

Please be aware that Security Policy is playing an important role in the DS. You need to make sure all protected VMs having correct Security Policy.

Once you finished the VA, we can go back to DS manager and take a quick look.

I would like to list some common issues you may encounter.

ds-01

If anti-Malware status is not Capable, it means vEndpoint is not installed on this ESX host.

ds-02

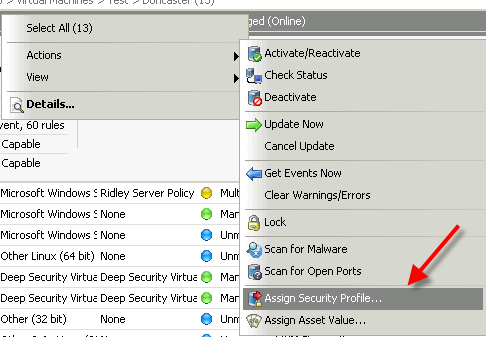
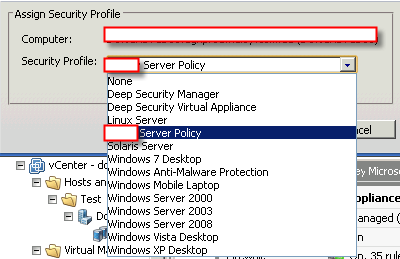
If Anti-Malware is on, but the color is blue. It means you haven’t assigned correct policy on this VM. In default, there is no policy at all. Just right click the VM and follow the instruction.

ds-03

ds-04

You better actually create your own policy before you apply. Some default policy(like windows 2k3) doesn’t have all protection on and doesn’t allow certain protocol (e.g: RDP). The best way is to make copy of old policy and customize a new one for yourself.

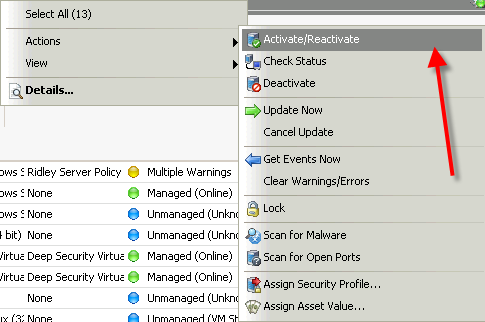
The next step is to prepare your VMs. All what you need to do is to install vShield Driver agent and DS Agent. Once you finish installation, you must reactivate your vm from DS Manager to let DS Manager to check VM status.

ds-05

If you have installed both agents and apply right policy, reactivate your vm from DS Manager. You should see something like this in the DS Manager.

ds-06

It should have all greens and Agent should running. Your VM should be protected at each level from crossing both Appliance(working with vEndpoint) and Agent.

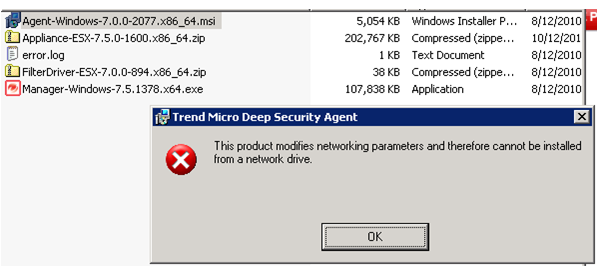
One more thing when you try to install DS Agent, you need to copy the installation on local disk of VM and install. Otherwise, you will encounter this error.

ds-27

Virus download test

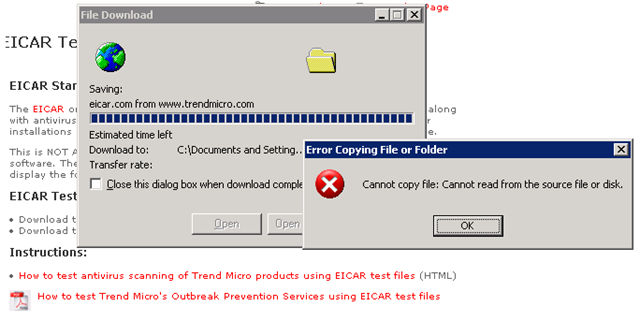
I have a protected VM which has all features turned on. Let’s see how it react when I tried to download a virus sample file from Internet.

ds-26

It actually worked!

Does Deep Security actually reduce resource consumption?

Here is the big question. The reason we spent so much time to deploy this product is the rumour that it can save the resource comparing with traditional AV solution. Let’s take a look.

I installed OfficeScan on one of test machines. I monitored the resource which has been consumed from CPU, Memory,DISK,Network for both test VM and Host as base line. I will scan a vm with officescan once. And also scan it with DS.

Protected VM CPU

Protected VM CPU with OfficeScan

ds-07

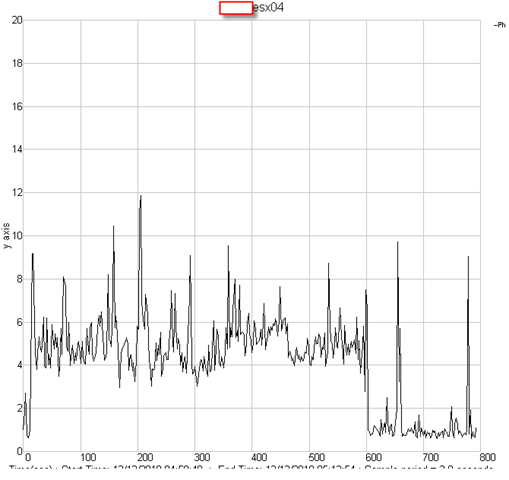
CPU: 50% of one core. It lasts 10 mins.

Protected VM CPU with DS

ds-13

ds-14

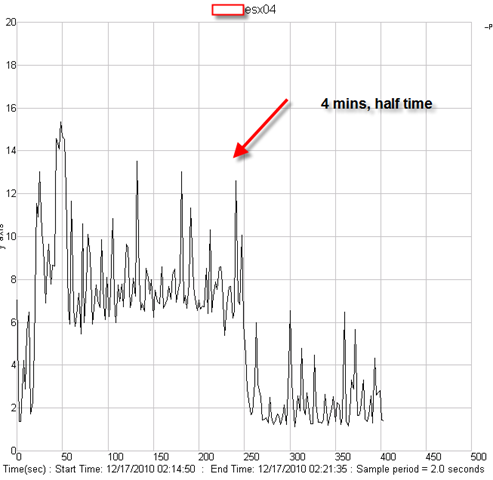
only 22% on CPU comparing with 50% on Office Scan.

Note: I ran twice on this test.

Protected VM DISK

Protected VM disk with OfficeScan

ds-08

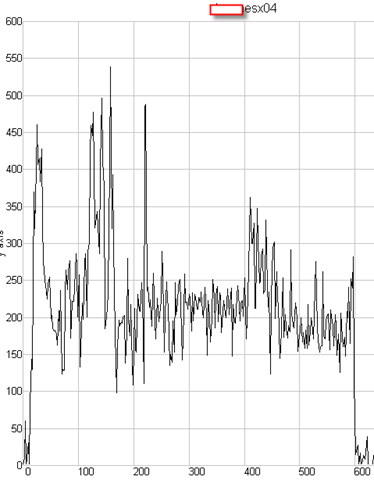
Disk: 5000KBps for 10 mins.

Protected VM disk with DS:ds-15

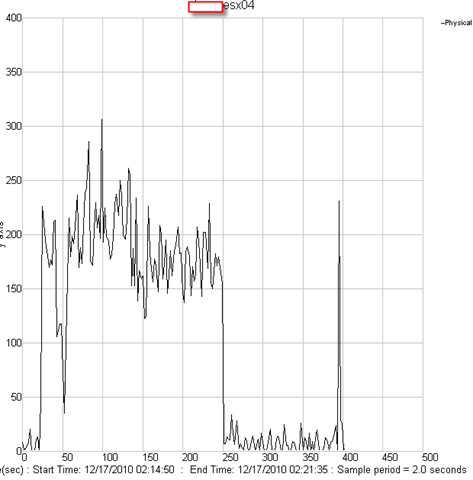
It’s very interesting to see the first run disk but nothing on second. The reason is the first run has already load disk data into memory and it doesn’t require to load again at second time. It proves DS is load to memory and scan only memory theory. The DS scan finished in 4.5 mins.

Protected VM Memory

Protected VM with OfficeScan

ds-09

Memory: Consumed memory is 1.25GB, and active memory is 4GB.

Protected VM with DS

ds-25

50% of active memory in 4.5 mins. I ran twice.

Protected VM Network

Protected VM with OfficeScan

ds-10

Network: OfficeScan tried to contact OfficeScan server at beginning. Then, it went quiet.

Protected VM Network Activity with DS:

ds-16

There is almost nothing on network. It means DS is using ESX module to scan memory directly. It doesn’t go through normal network channel. Because it is using similar theory as vSwitch, I call it a protected vSwitch channel.

From what I can see via Protected VM angle, the resource has been consumed almost 50% less and use only half time to finish scan.

Because using DA actually involves to use Deep Security Virtual Appliance to scan. We need to take look about DS VA.

DS VA CPU:

ds-17

The truth behind scene is DS VA is actually scanning the data instead of protected VM. That’s why you see low utilization on VM because all what it did was to load data into memory and call vShield Endpoint driver to let DS VA to scan.

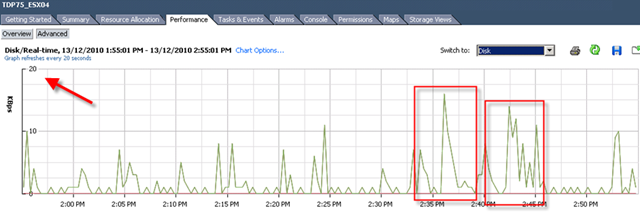
DS VA Disk:

ds-18

Almost nothing on disk VA disk activity.

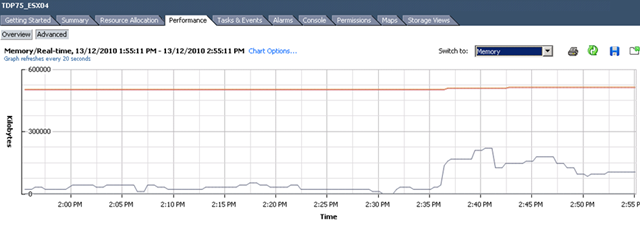
DS VA Memory:

ds-19

It consume 1.5GB memory on VA. It’s understandable.

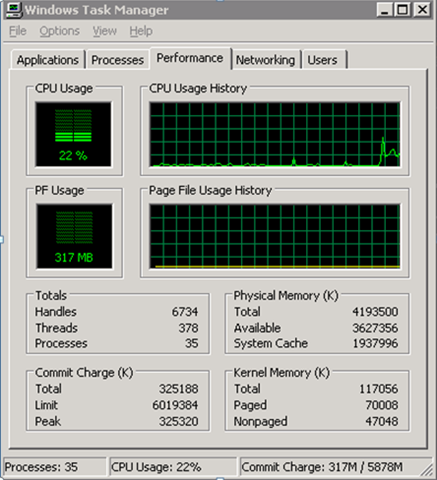
DS VA Network:

ds-20

This is very interesting. According to this chart, the network activity on DS VA is very high during scanning. It means vShield Endpoint will open port for all VMs sitting on that protected vSwitch instead of just DS VA.

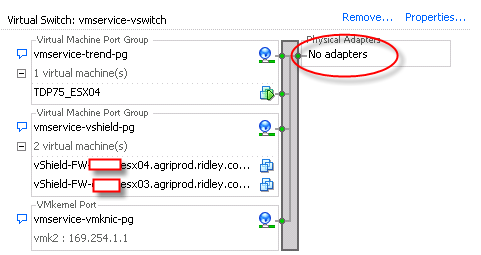
ds-21

This is the vSwitch vShield Endpoint use. It’s just normal vSwith and you can add adapters if you want. It does bring my concern whether this could be potential security breach.

Here is moment of truth. Will DS actually save resource from ESX perspective?

Following is the data from Physical ESX Host:

ESX CPU utilization

ESX CPU with OfficeScan

ds-22

4% of total CPUs on ESX box.  I have nothing else was running on that host.

ESX Host CPU Performance on DS

ds-23

It does finish scan in half time but it actually use 6% of CPUs. Be aware this is not including overhead of ESX host CPU. It’s 2% of higher than OfficeScan.

ESX Disk with OfficeScan

ds-12

Disk activity on ESX host.

ESX Disk activity with DS

ds-24

It’s same disk activity but with half loading time.

There ain’t much point to check memory since everything is happening in the memory. Just one module to scan another chunk of memory in the host. That’s all.

Conclusion:

Let’s sum up with what we have learned from those data. Please be aware I’m only test single machine scan.

Resource consumption:

ESX Host

OfficeScan DS 7.5
CPU Util 4% 6%
CPU Used time 10 mins 4.5 mins
DISK Util 200CMD/s 200CMD/s
DISK Used time 10 mins 4.5 mins
Memory Same Same
Network 0 0 Nothing on pNIC

It does seem like Host CPU is consumed more resource than officeScan.

but It seems that DS VA doesn’t support multiple threads scanning at same time. If that’s the case, a host can hold about 30 VMs max. So DS Manager will schedule to scan all machines in different time.

This is the end of this Session of this year!

I wish everyone has a wonderful Christmas and Happy New Year!!


In my previous post, I described about vShield Endpoint. In this post, I will talk about the only real product which is actually using and design with this concept. Trend Micro Deep Security 7.5.

Before I started to roll out details, I would like to thank Trend Micro Australia’s help to give me support when I stuck. Thanks guys.

trenddp_08

What can Trend Micro Deep Security 7.5 do?

First time I saw this product is on the Vmware seminar. When Trend Micro representative standing on the stage and demonstrate how Deep Security can use only 20% of resource to scan in the virtualization environment.  That was mind blowing because imaging VDI and VMs are calling for schedule scan at same time. How much pressure it will cost to ESX Host? This product is only working with vSphere 4.1. It’s using vShield Endpoint and must use vShield point to do it’s job.   Well, at least, that’s what Trend Micro claimed. So is this true? Please continue to read.

Note: DS 7.5 is actually merely designed for VM environment. It means it’s not a complete solution at this stage. If you want to protect your physical boxes or workstation, you better still use OfficeScan product.

Deep Security provides comprehensive protection, including:

  • Anti-Malware (detect&clean virus)
  • Intrusion Detection and Prevention (IDS/IPS) and Firewall (malicious attack pattern protection)
  • Web Application Protection (malicious attack pattern protection)
  • Application Control (malicious attack pattern protection)
  • Integrity Monitoring (Registry & file modification trace)
  • Log Inspection (inspect logs and event on vm)

The interesting about DS 7.5 and vShield Endpoint is that none of this product can provide complete solution for end users. Each of them play a certain roles in the system. So the result is actually combination of both software.

Let’s take a look with clear table.

trenddp_09

Note:

My suggestion for installing is to install both vShield Endpoint Agent and DS Agent on your VMs. That’s the only way you can protect your VMs.

Components of Deep Security 7.5

Deep Security consists of the following set of components that work together to provide protection:

Deep Security Manager, the centralized management component which administrators use to configure security policy and deploy protection to enforcement components: Deep Security Virtual Appliance and Deep Security Agent. (You need to install it on one of windows server)

Deep Security Virtual Appliance is a security virtual machine built for VMware vSphere environments, that provides Anti-Malware, IDS/IPS, Firewall , Web Application Protection and Application Control protection. (It will be pushed from DS manager to each ESX)

Deep Security Agent is a security agent deployed directly on a computer which can provide IDS/IPS, Firewall, Web Application Protection, Application Control, Integrity Monitoring and Log Inspection protection. (It need to be installed on the protected VMs)

As matter of fact, you need to download following files from Trend Micro website. Don’t forget to download filter-driver which will be pushed from DS Manager to each ESX host.

trenddp_10

Architecture of Deep Security 7.5

Let’s take a look.
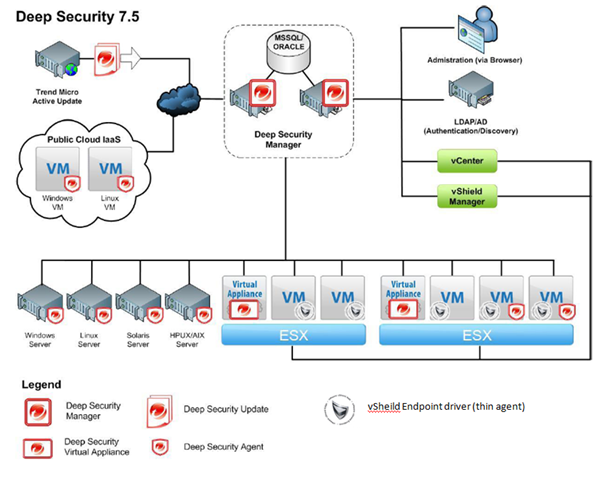
trenddp_02

There should be only have one DS manager unless you want to have redundancy.

ESX Host must be installed with vShield Endpoint.

Each ESX has it’s own Virtual appliance.

Each VM should have both vShield Endpoint and DS Agent installed.

How does Deep Security 7.5 work?
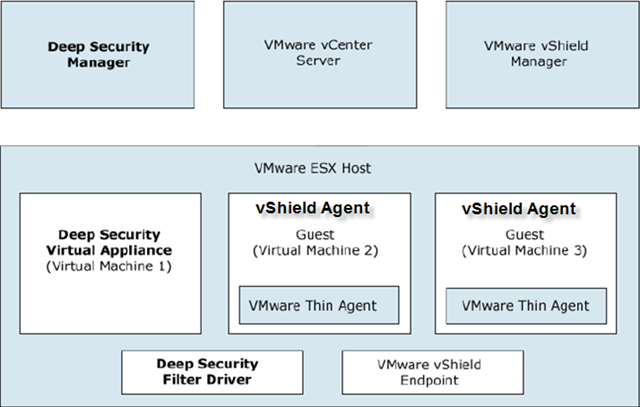
trenddp_16

For malware and virus check:

DS is using vShield Endpoint to monitor protected VM memory. The vSheild Endpoint Agent (or AKA vShield Endpoint thin driver) will open a special channel to allow DS virtual appliance to scan it’s memory via special vSwitch which is running on ESX kernel driver layer.

Since VMware needs to make sure the isolation of VMs traffic and memory, hard disk and no other application should breach this protection, vShield Endpoint is a back door opened by VMware to let third party to scan VM content legally and logically.

For registry keys and logs and other components of VM, we have to relay on DS Agent because vShield Endpoint can allow do so much. That’s why the solution must combine both vShield Endpint and DS agent.

Install Deep Security 7.5

I did encounter some interesting errors during the installation.

But let’s sort out the steps of installation first.

  1. Install Endpoint on your VMware ESXs.
  2. hostInstall DS manager on one of your windows box.
  3. Push Virtual Appliance, filter driver to each ESX host. It will add a appliance into vShield protected vSwitch. Filter driver will be loaded in the ESX kernel.
  4. Install DS agent, vShield Point Agent on VMs you want to protect.

Install Endpoint on your VMware ESXs.

Please click here to see how to do it.

Install DS manager on one of your windows box

Those are easy step. I believe any admin can do his job well.

Let’s me skip some easy parts.
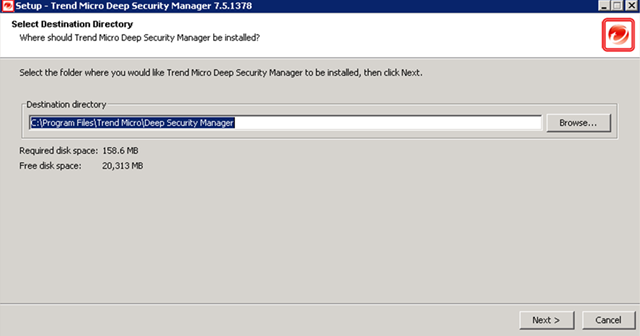
trenddp_11

skip,skip

trenddp_12

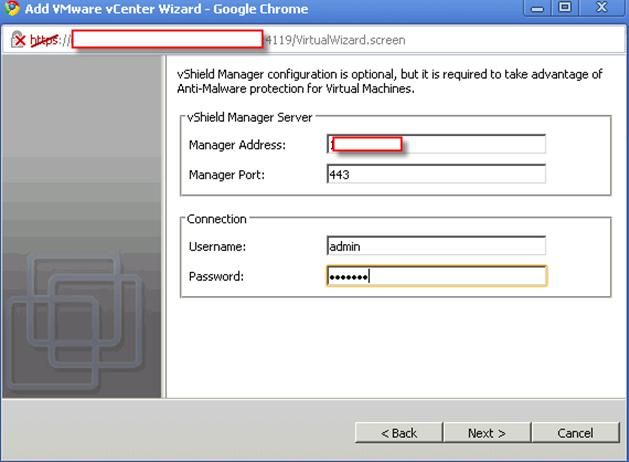
Once you finish installation of DS Manager. You need to configure the DS Manager.
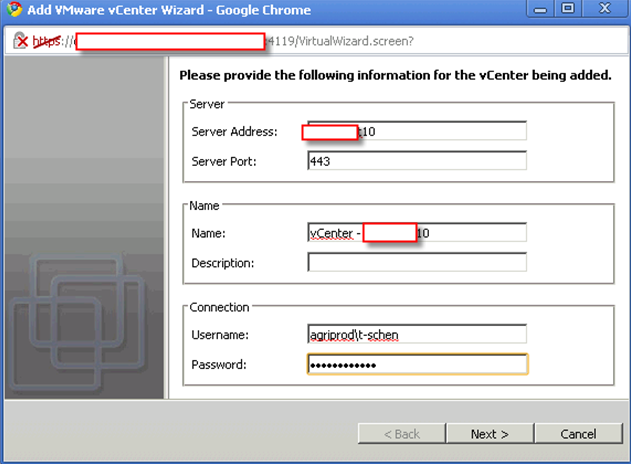
trenddp_13 trenddp_14

trenddp_15

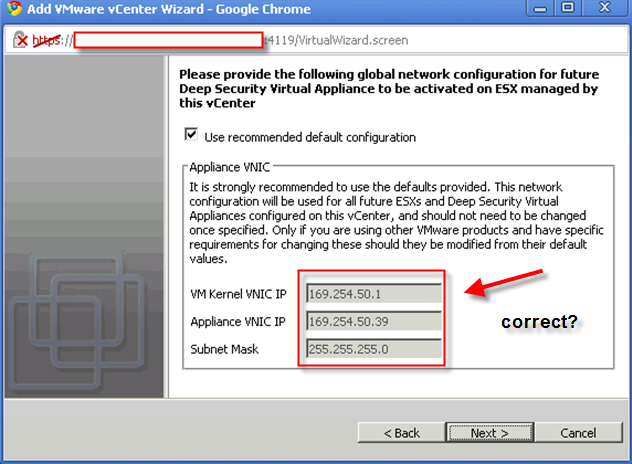
This is really tricky part. What are those IP for?

The answer is those IP must not be occupied and it must be in the same subnet as rest of your vShield components are.

Check out this diagram and find out your own vShield  subnet.

On your ESX host(which has Endpoint installed already), you should find this.
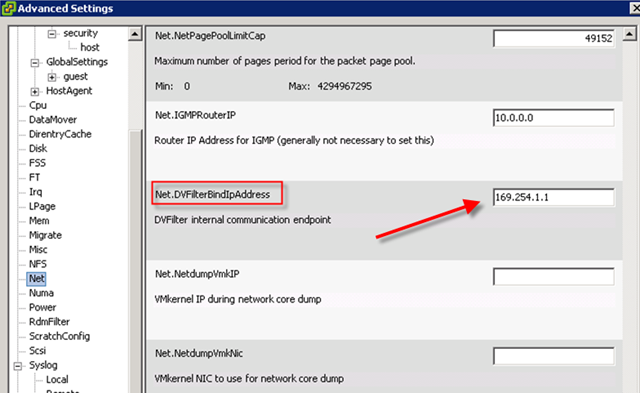
trenddp_17

so what’s your vSheild Subnet?

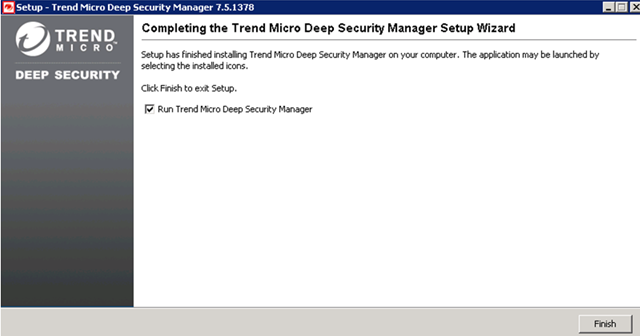
The rest is easy part. skip,skip
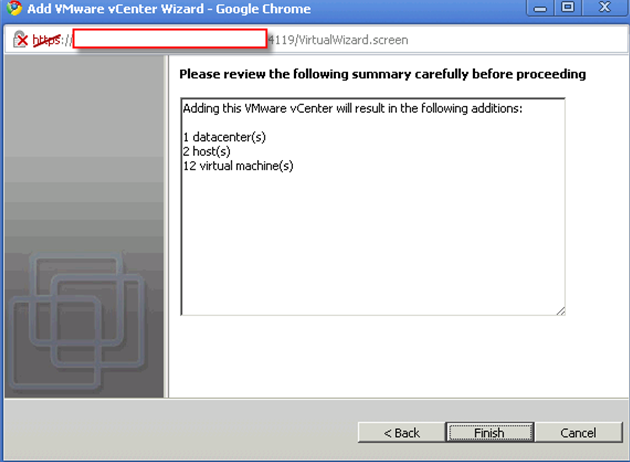
trenddp_18

trenddp_19

Basic Configure DS Manager

By now, you have already connect to vCenter and vShield Manager. You suppose to see something like that.
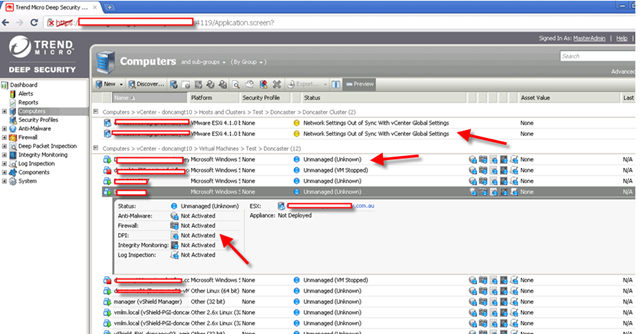
trenddp_20

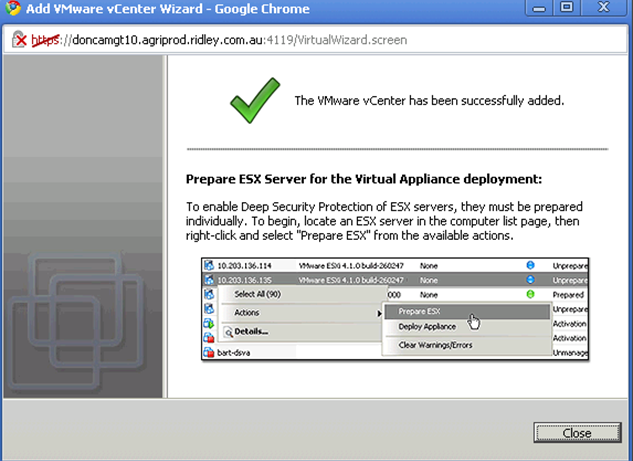
Notice nothing is actually managed and ready. That’s because you need to “Prepare ESX”.

Notice:

Before you “Prepare ESX”, you need to make sure vShield Endpoint has already installed and you have already download all DS components.
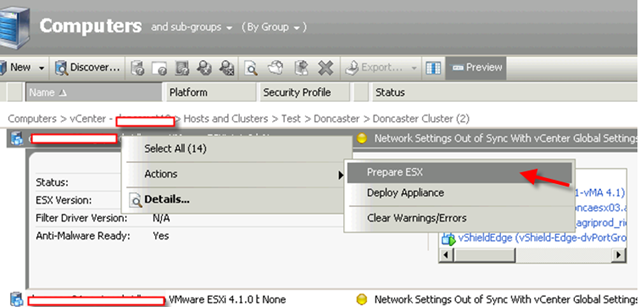
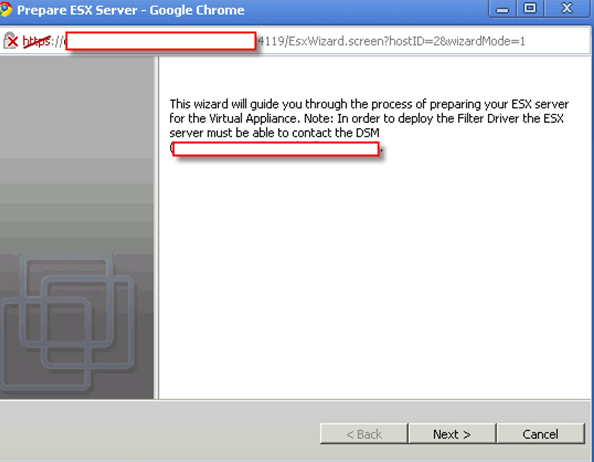
trenddp_21

trenddp_22

If you didn’t setup your vShield subnet correct, you will run into this error.
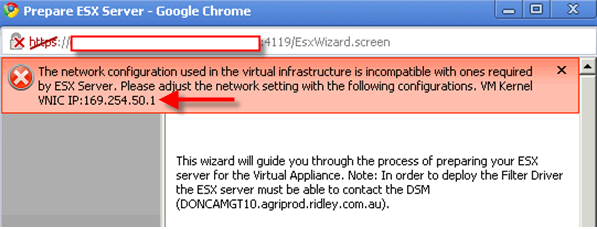
trenddp_23

In my case, I just need to right click vCenter->Properties-> Network Configuration
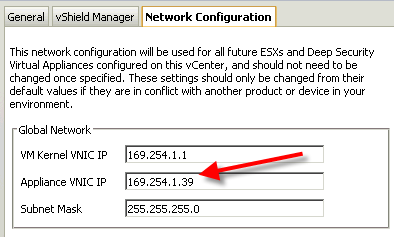
trenddp_24

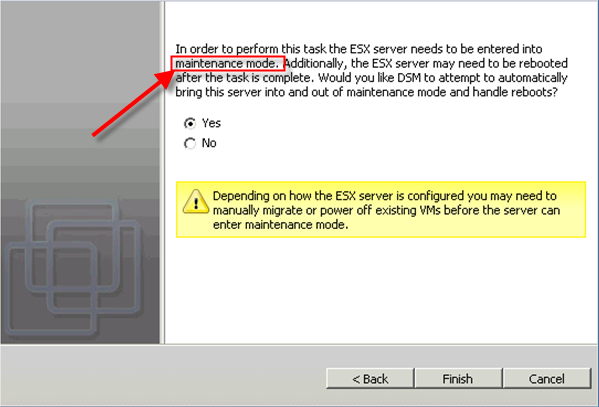
please be aware you need to put your ESX into maintenance mode and restart it in terms of pushing DS virtual appliance and filter driver.
trenddp_25

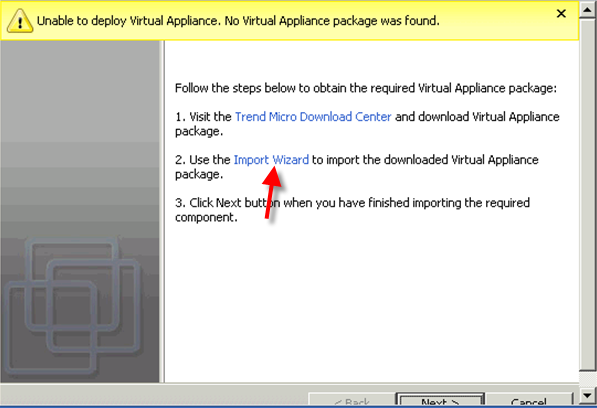
You need to import your downloaded files into DS Manager. If you didn’t import before, you will have chance to import again or download.
trenddp_26

As usually, I skip some steps.

trenddp_27

trenddp_28

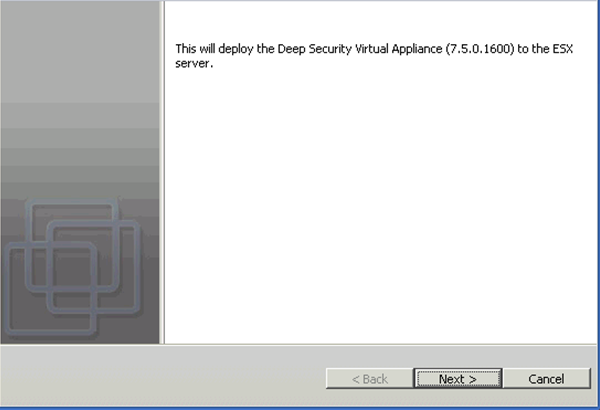
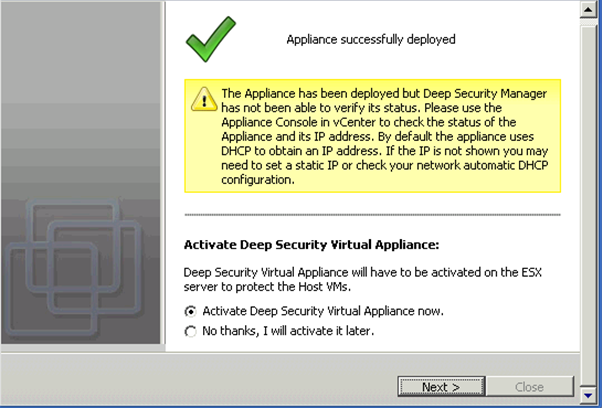
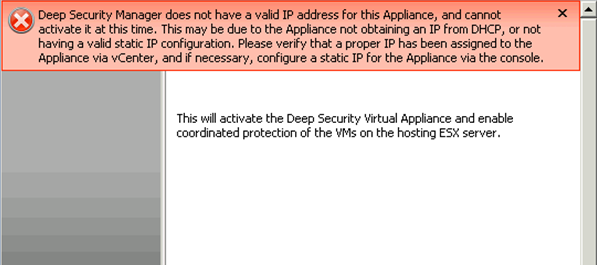
Here is another tricky. Because my ESX has different default IP as DS default. so once the DS Manager deploy the virtual appliance to ESX, the appliance only has default DHCP IP which is wrong in my case also the virtual network is also wrong. I encounter this problem.
trenddp_29

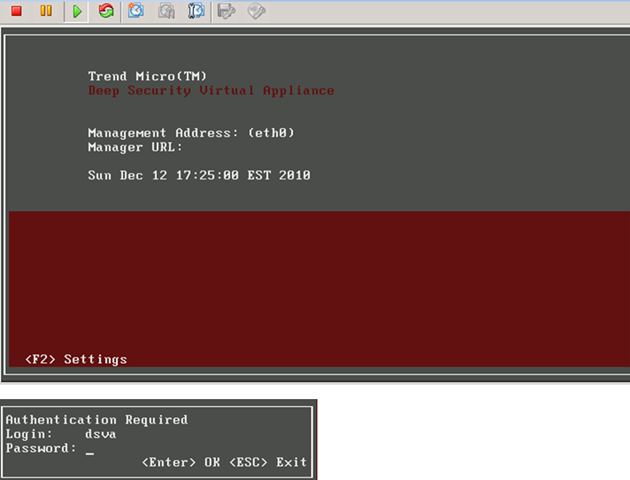
All what you need to do is to jump on ESX and virtual appliance console to change IP of that appliance. The default username and password is dsva.
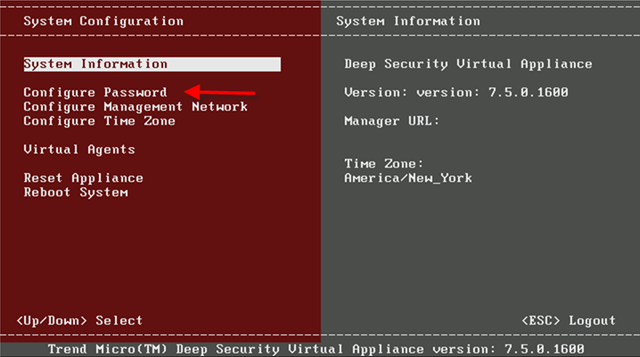
trenddp_30

trenddp_31

Once you changed the IP, reboot this VM. Go back to DS Manager and double click dsva object to activate it.
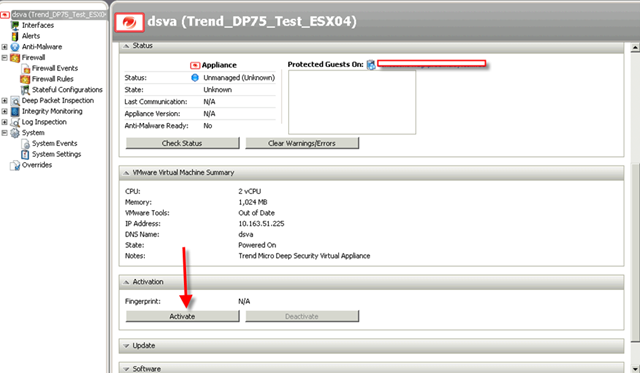
trenddp_32

Make sure the security profile is loaded. That’s very important!!
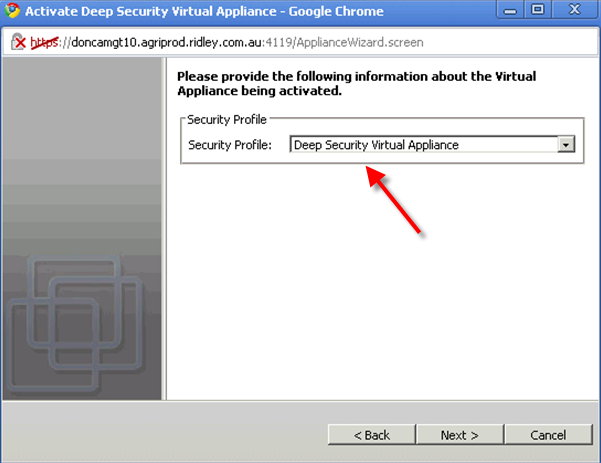
trenddp_33

System will automatically offer you some VMs to protect. You can choose “no” at this stage. Why? because you haven’t installed vShield Endpoint agent and DS agent on your VMs yet.
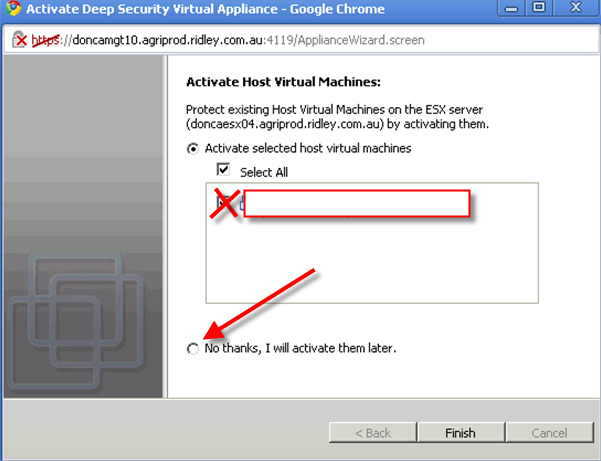
trenddp_34

By now, the installation steps have finished here.

In my next post, I will talk about how to configure Trend Micro Deep Security 7.5 and performance result comparing with OfficeScan and virus testing.

Let me show you a picture what a DS manager look like when a VM is fully protected to finish this post.

trenddp_36

Reference:

Trend Micro Deep security installation guide

Trend Micro Deep security User guide


First of all, I would like to apologize for updating my blog late since I was called away last week and not able to do too much.

I’m going to talk about vShield Edge and vApp. First of all, let’s review why we need vShield Edge. The last post can be found here.

What is vEdge?

vShield Edge is deployed as a virtual appliance to provide firewall,VPN, Web(HTTP only) load balancer, NAT, and DHCP services. Eliminate the need for VLANs by creating a barrier between the virtual machines protected by vShield Edge and the external network for port group isolation. Satisfy your network security within virtualized environments:

  • Consolidate edge security hardware: Provision edge security services, including firewall and VPN, using existing vSphere resources, eliminating the need for hardware-based solutions.
  • Ensure performance and availability of web services: Efficiently manage inbound web traffic across virtual machine clusters with web load balancing capabilities.
  • Accelerate IT compliance: Get increased visibility and control over security at the network edge, with the logging and auditing controls you need to demonstrate compliance with internal policies and external regulatory requirements.

Why do we need vEdge?

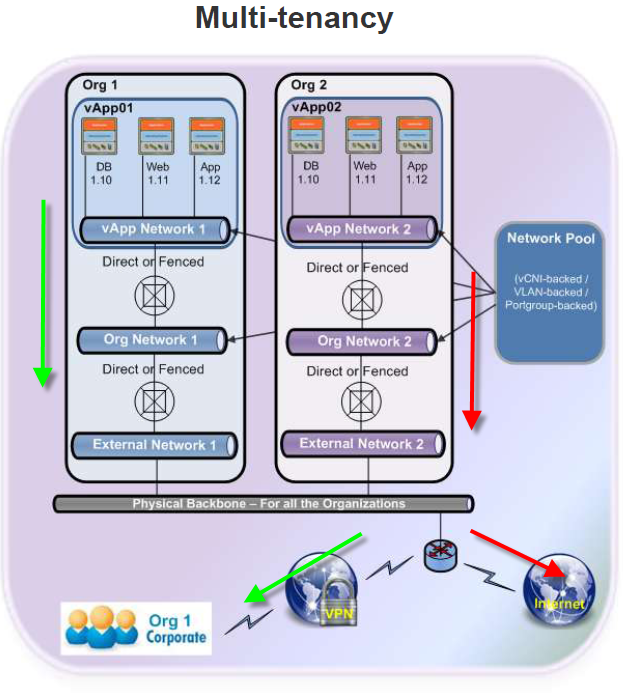
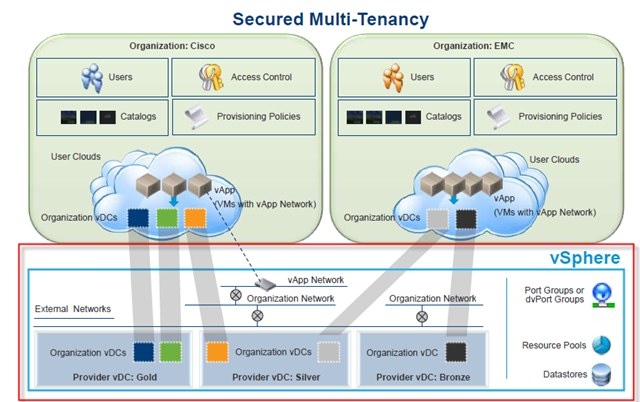
VMware is trying to design cloud system which can be used by ISP to host multiple Enterprise clouds on one datacenter.

vshield-edge01

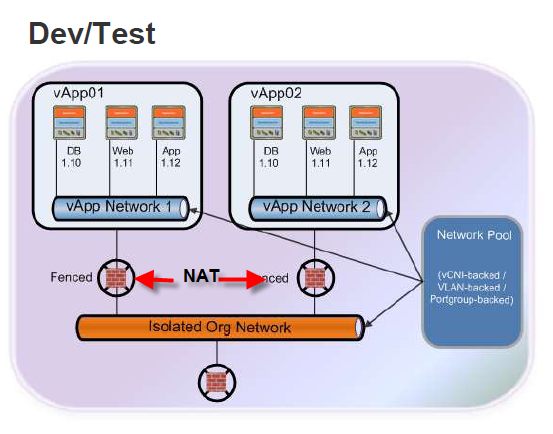
VMware needs a cheap and efficient way to manage internal network to make sure the data between different clouds can be isolated from different network level but also be connected with well control. vEdge is used to allow you to isolate different cloud with NAT, load balance, DHCP and VPN.

Here is a good example for NAT using. There are two Test environment coexists in the same network because NAT function vEdge provides.

vshield-edge02

With vEdge, you can separate your Network tenancy into different connections without security breach or other threat.

vshield-edge03

Install vEdge

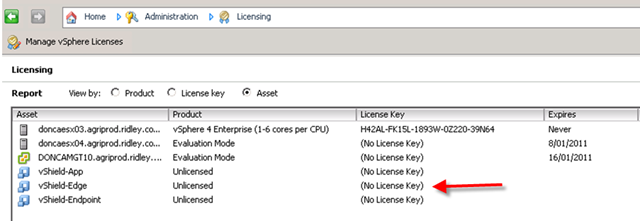
Installing vEdge is required to install license first. It’s the same location as you will do for others.

vshield-edge04

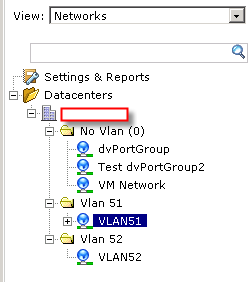
The next step is to choose which vSwitch (vSS or vDS) you want to deploy vEdge. Not like Zone which can be installed on vNic level, vEdge can be only setup on PortGroup.

vshield-edge05

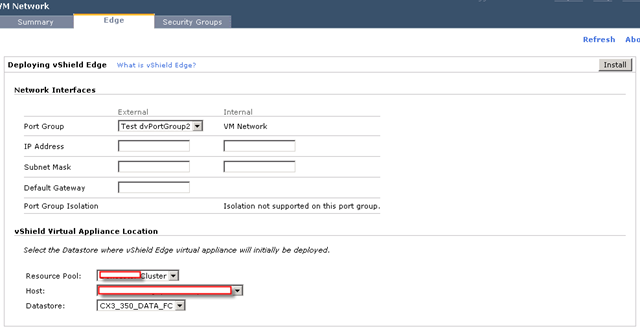
All what you need to do is to choose a portgroup and click Edge menu on the right hand and provide information for vEdge VM and click to install.

vshield-edge06

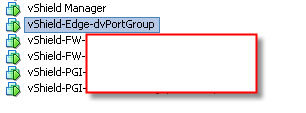
Since vShield zone is base on Network crossing host, only one VM will be created and deployed by vShield Manager.  vSheild-Edge-DvPorgGroup can be migrated to other Host without any issues.

vshield-edge07

There is option when you install vEdge on Portgroup. It’s called Port Group Isolation.

You can prepare and install a port group isolation on vDS. It is an option for vEdge and it only works for vDS based vShield Edge. The port group Isolation creates a barrier between the protected VM and external network. Only NAT nuels or VLAN tags are configured.

At same time, a new vShield-PGI-dvSwitch will be created to handle traffic control. Each port group isolation will create a new VM.

Configuring vEdge

Everyone configures it differently. Please check out screen shots.

vshield-edge08

Firewall

vshield-edge09

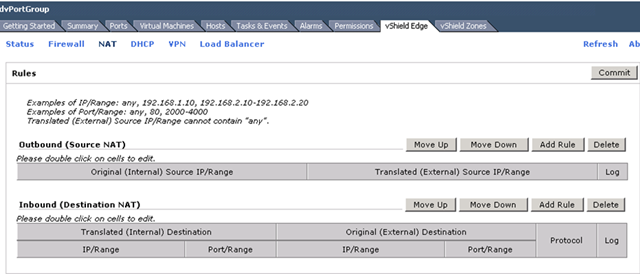
NAT

vshield-edge10

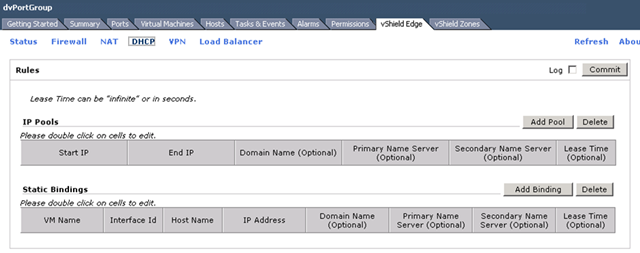
DHCP

vshield-edge11

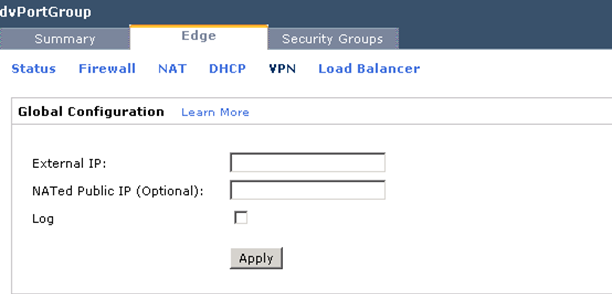
VPN

vshield-edge12

Load Balancer

Load Balancer is only for HTTP protocol at this stage. It’s designed for front web servers.

vshield-edge13

Few things to be aware:

  • At this day, vEdge can handdle 40,000 concurrent sessions.
  • You can make rules in the different layer, but new rules don’t apply to established sessions unless you manually apply it.
  • You can always create security groups as logical unit to manage your rules.
  • There is no package capture functions in vShield.
  • vEdge license can be included in Vmware View premium version.
  • vZone license can be included in vSphere Advanced.
  • vApp license can be included in vCloud director.

We will talk about vApp in next post.


This is always interesting topic about using 1 core in VM most likely get better performance comparing with using 4 cores, not mention 8 cores. However, there are cases you want to use 8 cores vCPUs. I have recently experienced this real case and I would like to share it to you.

Why do we need to have multiple cores in VM?

Well, first of all, let me introduce our environment to you. We are using Dynamics AX 2009 and recently are conducting MRP model Test. MRP model requires to run batch jobs which could take up to 7 hours to finish on single core VM. The database of Dynamics AX 2009 is on our SQL box but , with batch job, most of them are CPU work and it runs on a VM.

As what I mentioned above, with single core (Dynamics AX 2009 MRP natively only run one thread even on multiple cores machine), the time of finishing batch job is unacceptable in real world. Therefore, Microsoft develops “helper” to assist. Each helper suppose to represent a core. It means, if I run batch job on 4 core VM, I need to setup 3 helpers (plus original one thread to make it 4).

Microsoft is not recommending to run batch jobs on VM (because their hyper-v sucks? 😉 ) but I’m pretty happy to put it into test. Before you continue to read on, I have to remind you MRP helpers are very new to this world. It is far from perfect….. yes, far far from………

My test Environment:

SQL: SQL 2005 with latest patch running on physical box

VM: Windows 2003 Standard 32bit

ESX Host software: ESXi, 4.1.0 260247 with Evaluation license

There is only one VM running on that ESX Host.

ESX Host hardware: HP Proliant DL380 G5, 2 Quad Core X5460, 16GB mem.

Storage: SAN, EMC CX3

Tools involved: Performance Monitor on  Windows, ESXtop, vMA 4.1, FASTSCP,Excel,ESXplot

Number of core: 4, 8 (each Test involves different number of cores)

Single Core Test

This is a Test running without any helpers and distributions. It means batch server is running single thread on 4 cores VM. Distribution is number of job list. In theory, number of distribution should equal number of cores.

First Test, bench mark test

Test Num distribution Helpers Job Name Running time
1 0 0 FP20 260 min


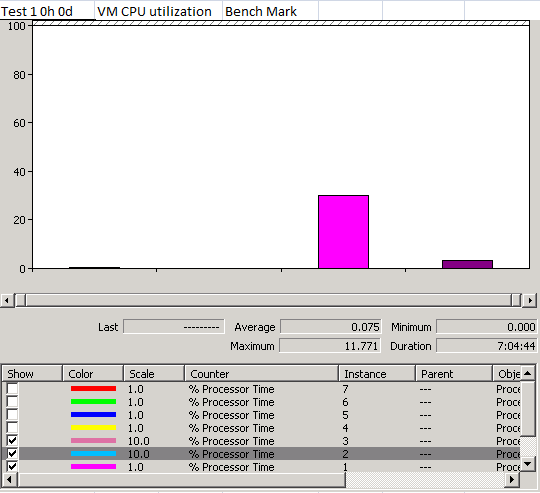
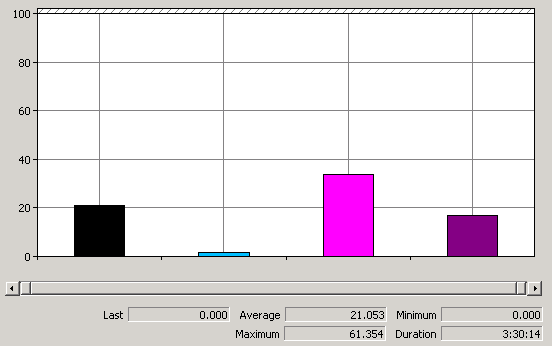
Batch VM Performance (the performance monitor is setup as 8 cores, but VM only has 4 cores)

4core_01

From this picture, you can see only one core has been used. It’s about 38% utlization.

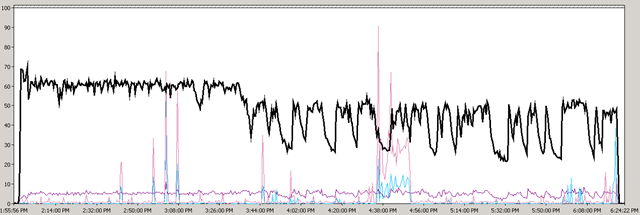
Line graphic of VM CPU

4core_03

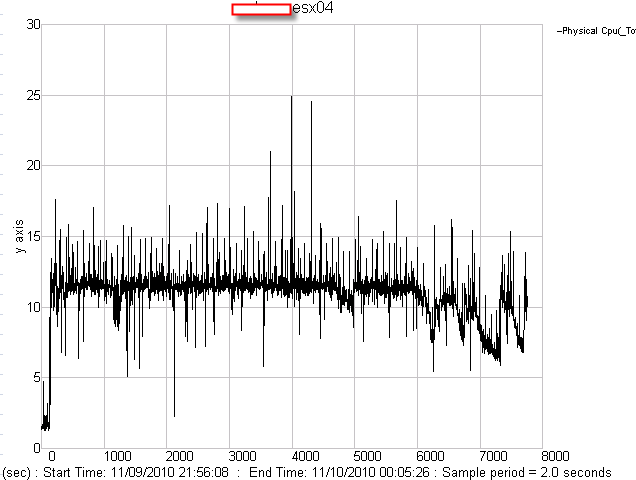
HOST status

4core_02

This is result I got from esxtop. This is total CPU loader status. Since we are using VM, so single virtual core job is distributed to 8 physical cores. It runs about 13% of physical CPU resources. This is utilization of pCPU which include pCPU over head.

Test 2 with 3 helpers and 4 distributions

Test Num distribution Helpers Job Name Running time
1 0 0 FP20 260 min
2 4 3 FP20 207min


Notice we are using much less time in this test!! The new test is only using 79% time of single thread.

4core_04

This is 4 cores VM. Notice the blue core utilization is very low. It’s possible that windows reserve one core for it’s OS. All cores were utilized very low!

However, as what I said, the helpers are very new for MRP. So it’s very poor coded. Let’s see what each vCPU has done during the time.

vCPU0

4core_05

Notice there are time vCPU0 was very low utilized..

vCPU1

4core_06

vCPU2

4core_07

My best guess is this is reserved core for OS.

4core_08

Poor coding….

Let’s check out HOST CPU

4core_09

Notice that physical CPU usage is actually higher than single thread.

Test 6 with 8 cores VM and 12 helpers, 6 distribution

I did some other tests with 8 cores. I setup vm with 8 cores and lots of helpers and distributions. As you can see, the running time is shorted again. But as what I said, due to poor coding, it’s not always effective as I expected.

Test Num distribution Helpers Job Name Running time
5 5 7 FP20 180min
6 6 12 FP20 168min


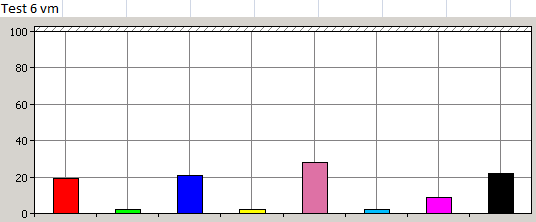
4core_10

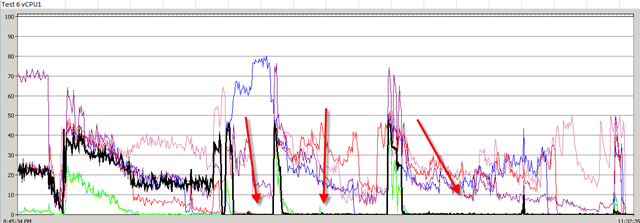
None of cores are running more than 40%. Still, it’s coding issue.

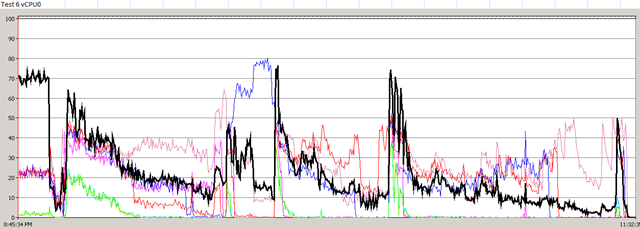
vCPU0

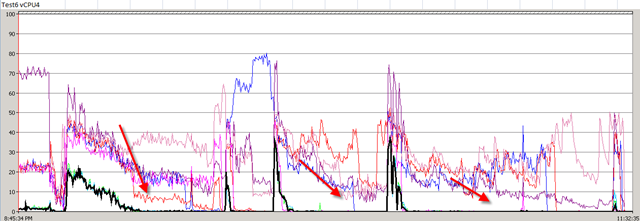
4core_11

vCPU1

4core_12

The problem of this poor coding is it doesn’t use all cores in all the time. There are lots of time only few cores are used.

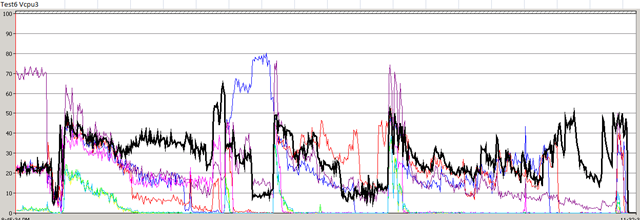
vCPU2,4,6

4core_13

There 3 cores running in this shape. It’s pretty pity resources are wasted.

vCPU3,7

4core_14


This is not bad usage.

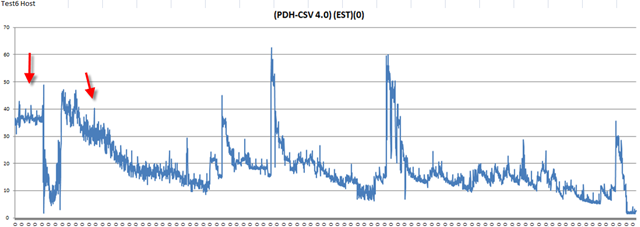
ESX Host CPU

4core_15

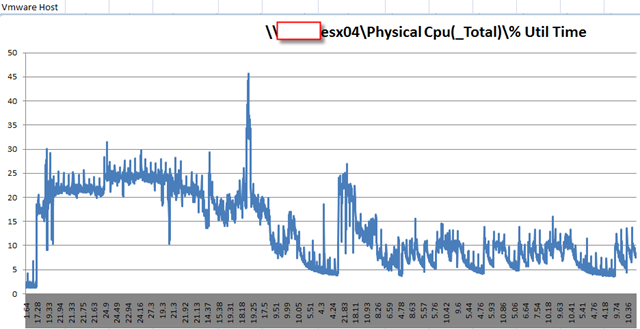
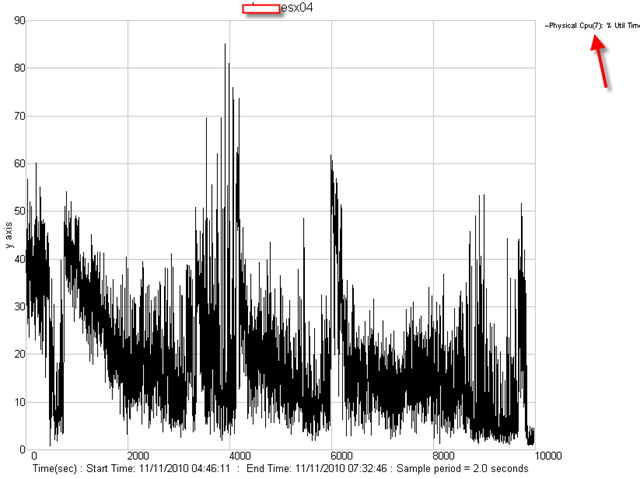
As you can see, the maximum usage has reached to 40%. but for the rest period, the usage dropped due to few cores were used.

Let’s see what a single physical CPU doing on ESX host

pCPU07

4core_16

There are lots of up and down and spikes due to distribution by ESX layer.


Conclusion of this Test:

1. Dynamics AX batch server can run on VM. As matter of fact, it works pretty good with current MRP helpers patch. You can load up with other VMs to utilize more CPU resources.

2. 8 cores does help a lot in this case. Since all cores were only used less than 40%! Thank God we are using virtualization layer and all virtual cpu jobs are distributed to physical CPUs.

Leave ur comments. 😉


In my last post, I talked about Network IO Control. I think it’s better for me to discuss another interesting function of new vSphere 4.1, Storage IO Control.

Storage IO Control is really something easy to setup and leave difficult jobs to Vmware operation. However, there are quite bit information on the Internet, I’m trying to put them together and explain it to you in an easy way.

What is Storage IO Control ?

Storage I/O Control (SIOC), a new feature offered in VMware vSphere 4.1, provides a fine-grained storage control mechanism by dynamically allocating portions of hosts’ I/O queues to VMs running on the vSphere hosts based on shares assigned to the VMs. Using SIOC, vSphere administrators can mitigate the performance loss of critical workloads during peak load periods by setting higher I/O priority (by means of disk shares) to those VMs running them. Setting I/O priorities for VMs results in better performance during periods of congestion.

There are some misunderstanding here. Some people say SIOC will only kick in when threshold is breached. I believe SIOC will always work for you at all the time to make sure datastore latency close to the congestion threshold if you enable this feature.

Prerequisites of Storage IO Control

Storage I/O Control has several requirements and limitations.
  1. Datastores that are Storage I/O Control-enabled must be managed by a single vCenter Server system.
  2. Storage I/O Control is supported on Fibre Channel-connected and iSCSI-connected storage. NFS datastores and Raw Device Mapping (RDM) are not supported.
  3. Storage I/O Control does not support datastores with multiple extents. (We should try to avoid extend volumes to multiple datastore in all time and also try to use consistent block size for VAAI sake)
  4. Before using Storage I/O Control on datastores that are backed by arrays with automated storage tiering capabilities, check the VMware Storage/SAN Compatibility Guide to verify whether your automated tiered storage array has been certified to be compatible with Storage I/O Control. (I believe the latest EMC F.A.S.T is upported with this function. But you have to wait for latest FLARE 30 to make it work).
  5. All ESX Hosts connecting to the datastore which you want to use SIOC must be ESX 4.1. (You can’t enable SIOC while you have ESX 4.0 connecting to that SIOC datastore). Of course, you need to have vCenter 4.1 as well.
  6. Last but not least,  you need to have Enterprise Plus license in terms of enable this function. 😦

How does Storage IO Control work?

There are quite few blogs regarding this topic.  Essentially, you can setup share level for each single VM (actually, you setup for each VM disk) and apply limits if you have to. Those values will be used when SIOC is operating.  Please be aware that SIOC doesn’t just monitor a single point and adjust a single value to make your latency lower than dedicate thershold. It actually change multiple layers of IO flow to make it happen ( I will explain it later).

Before Storage IO Control appears

Let me quote Scott Drummonds article to explain the difference between previous disk share control and SIOC.

The fundamental change provided by SIOC is volume-wide resource management. With vSphere 4 and earlier versions of VMware virtualization, storage resource management is performed at the server level. This means a virtual machine on its own ESX server gets full access to the device queue. The result is unfettered access to the storage bandwidth regardless of resource settings, as the following picture shows.
This is from Yellow-brick:

As the diagrams clearly shows, the current version of shares are on a per Host basis. When a single VM on a host floods your storage all other VMs on the datastore will be effected. Those who are running on the same host could easily, by using shares, carve up the bandwidth. However if that VM which causes the load would move a different host the shares would be useless. With SIOC the fairness mechanism that was introduced goes one level up. That means that on a cluster level Disk shares will be taken into account.

As far as I believe, SIOC starting point is no long only manage a single host IOPS, instead, it monitors data-store wide level, Host HBA queue and VM IOPS together to dynamically monitor and adjust IO. If the flag is up, SIOC will come down and adjust multiple layers IO to make sure high disk share VMs are prioritized.
Monitoring and adjusting points:

Each VM access to it’s Host’s I/O queue. SIOC must make sure it’s base on I/O priority of VM (disk shares).

Each Logical device I/O queue of each host. The lower limit is 4 and Upper limit is minimum of (queue depth set by SIOC and queue depth set in the HBA driver ).

SIOC monitors the usage of device queue in each host, aggregate I/O requests per second from each host (be aware this is aggregation of I/O numbers and per I/O package size and divide by seconds)and datastore-wide I/O latency every 4 seconds (for individual datastore). Also throttles the device queue in each host.
How to setup Storage I/O control?

Let what I have mentioned above, it’s fairly easy to setup as long as you go through prerequisite list.

All what you need to do is to tick that box.

If you try to customize threshold, you can click Advanced button.

In terms of seeing SIOC is actually working, please go to vCenter->Datastores->select your storage->Performance. You can see none of VM disks have more than 30ms latency. (sorry, there is no work load in the picture).

Reference:

http://vpivot.com/2010/05/04/storage-io-control/

http://www.yellow-bricks.com/2010/06/17/storage-io-control-the-movie/

http://www.vmware.com/files/pdf/techpaper/vsp_41_perf_SIOC.pdf


One of biggest changes for vSphere 4.1 is introduction of Network I/O control and Storage I/O.

This post will give you an introduction and understanding of what Network I/O control (NetIOC) is. This is a new technology and we still need to wait and see more real case in the future. But for now, Let’s see what Network IO control is.

Why do we need to have Network IO Control (NetIOC)?

1. 1Gbit network is not enough

As you may know, we have more and more demanding on the network traffic. FT traffice, iSCSI Traffic(Don’t you team up?) and NFS Traffic, vMotion Traffic etc. Although you can team up multiple physical nics together, but from a single VM perspective, it can only allow to use one physical nic at one time no matter what kind of teaming method you are using. Plus, network team has already started to talk about 100Gbit network and it’s about time to push 10Gbit network into public.

2. Blade server demands

All new blade server has 10Gbit ports switch in the blade. The architecture of Blade server has changed from each blade has it’s own ports to central ethernet Module. It saves a lot of resource and traffic can be easily Qos and scaled.

Prerequisites for Network IO control

1. You need Enterprise Plus license

The reason for that is NetIOC is only available for vDS. For vSS, you can only control outbound traffic.

2. You need vSphere 4.1 and ESX 4.1

With vSphere 4.0, you do can control traffic by port group. But you can’t preconfigure traffic by type (or you can call it by class). This is fundamental architecture change. We will talk about it later.  ESX 4.1 is also required otherwise you won’t see the new tab in the vCenter.

How does Network IO Control (NetIOC) work?

If you recall vSphere 4.0, we also have ingress and egress traffic control for vDS.(for vSS, we only have outbound control) Traffic shaping is controlled by Average Bandwidth, pea bandwidth and bust size. You have manually divide dvUplinks by functions. Like this dvUplink is for FT, this is for vMotion, this is for iSCSI etc. Everything is done by manual.

With new vSphere 4.1, we are not only able to control traffic by port group, we are also control traffic by class.

The NetIOC concept revolves around resource pools that are similar in many ways to the ones already existing for CPU and Memory.
NetIOC classifies traffic into six predefined resource pools as follows:
• vMotion
• iSCSI
• FT logging
• Management
• NFS
• Virtual machine traffic

If you open vCenter, you will see the new tab of dvSwitch  in your ESX i 4.1 server.

This means all traffic go through this vDS will be under Qos by these rules. Remember, it only works for this vDS.

Now, let’s see the architecture picture first and then, we talk about how this thing work.

As you can see, there are 3 layers in NETIOC. Teaming Policy, shaper and Scheduler. As what my previous post mentioned, vDS is actually a combination of special hidden vSS and policy profiles downloaded from vCenter.

Teaming policy (New policy, LBT)

There is a new method of teaming called LBT(Load base teaming). It basically detect how busy those physical nics are, then it will move the flows to different cards. LBT will only move a flow when the mean send or receive utilization on an uplink exceeds 75 percent of capacity over a 30-second period. LBT will not move flows more often than every 30 seconds.

Best practice 4: We recommend that you use LBT as your vDS teaming policy while using NetIOC in order to maximize the networking capacity utilization.
NOTE: As LBT moves flows among uplinks it may occasionally cause reordering of packets at the receiver.

I haven’t done any tests on how much extra CPU cycles are required to run LTB, but we will keep eyes on it.

Limits

There are two attributes( Shares and Limit) you can control over traffic via Resource Allocation. Resource Allocation is controlling base on vDS and only apply to this vDS. It applies on vDS level not on port group or dvUplink level. Shaper is where limits apply. It limits traffic by the class of traffic.  Be noticed at this 4.1, each vDS has it’s own resource pool and resource pool are not shared between vDS.

A user can specify an absolute shaping limit for a given resource-pool flow using a bandwidth capacity limiter. As opposed to shares that are enforced at the dvUplink level, limits are enforced on the overall vDS set of dvUplinks, which means that a flow of a given resource pool will never exceed a given limit for a vDS out of a given vSphere host.

Shares

Shares apply to dvUplink Level and each share rates will be calculated base on traffic of each dvUplink. It controls share value of traffic going through this particular dvUplink and make sure share percentage is correct.

the network flow scheduler is the entity responsible for enforcing shares and therefore is in charge of the overall arbitration under overcommitment. Each resource-pool flow has its own dedicated software queue inside the scheduler so that packets from a given resource pool won’t be dropped due to high utilization by other flows.

NetIOC Best Practices

NetIOC is a very powerful feature that will make your vSphere deployment even more suitable for your I/O-consolidated datacenter. However, follow these best practices to optimize the usage of this feature:

Best practice 1: When using bandwidth allocation, use “shares” instead of “limits,” as the former has greater flexibility for unused capacity redistribution. Partitioning the available network bandwidth among different types of network traffic flows using limits has shortcomings. For instance, allocating 2Gbps bandwidth by using a limit for the virtual machine resource pool provides a maximum of 2Gbps bandwidth for all the virtual machine traffic even if the team is not saturated. In other words, limits impose hard limits on the amount of the bandwidth usage by a traffic flow even when there is network bandwidth available.

Best practice 2: If you are concerned about physical switch and/or physical network capacity, consider imposing limits on a given resource pool. For instance, you might want to put a limit on vMotion traffic flow to help in situations where multiple vMotion traffic flows initiated on different ESX hosts at the same time could possibly oversubscribe the physical network. By limiting the vMotion traffic bandwidth usage at the ESX host level, we can prevent the possibility of jeopardizing performance for other flows going through the same points of contention.

Best practice 3: Fault tolerance is a latency-sensitive traffic flow, so it is recommended to always set the corresponding resource-pool shares to a reasonably high relative value in the case of custom shares. However, in the case where you are using the predefined default shares value for VMware FT, leaving it set to high is recommended.

Best practice 4: We recommend that you use LBT as your vDS teaming policy while using NetIOC in order to maximize the networking capacity utilization.

NOTE: As LBT moves flows among uplinks it may occasionally cause reordering of packets at the receiver.

Best practice 5: Use the DV Port Group and Traffic Shaper features offered by the vDS to maximum effect when configuring the vDS. Configure each of the traffic flow types with a dedicated DV Port Group. Use DV Port Groups as a means to apply configuration policies to different traffic flow types, and more important, to provide additional Rx bandwidth controls through the use of Traffic Shaper. For instance, you might want to enable Traffic Shaper for the egress traffic on the DV Port Group used for vMotion. This can help in situations when multiple vMotions initiated on different vSphere hosts converge to the same destination vSphere server.

Let me know if you have more questions.

Reference:

http://h18000.www1.hp.com/products/blades/components/ethernet/10-10gb-f/specifications.html

http://kb.vmware.com/selfservice/microsites/search.do?language=en_US&cmd=displayKC&externalId=1022585

Click to access VMW_Netioc_BestPractices.pdf